
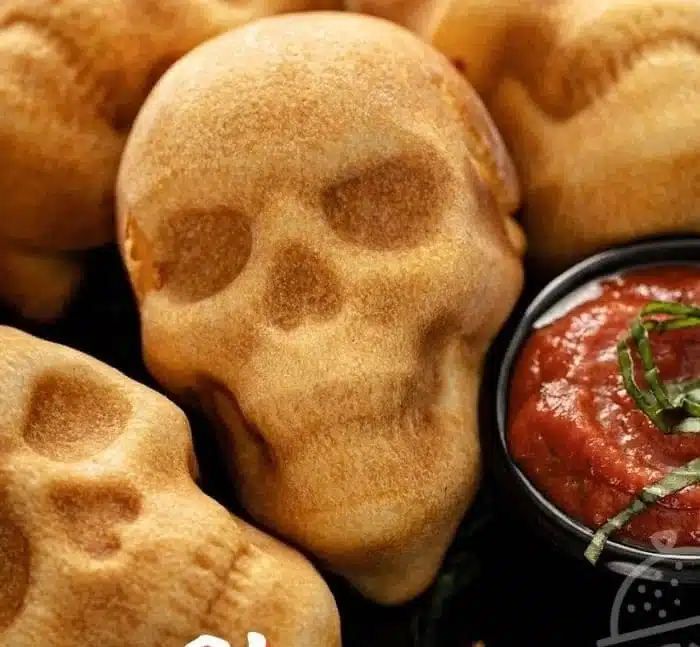
How to make Cheesy Halloween Pizza Skulls
Ingredients:
- 13 to 16 ounces of pre-made pizza dough
- 3/4 to 1 cup pizza sauce
- 2 cups shredded mozzarella cheese
- Parmesan cheese (about 1/4 cup)
- Cooked sausage (about 8 ounces for 6 pizza skulls)
- Mini pepperoni (about 6 ounces for 6 pizza skulls)
- Black olives (sliced)
- Sliced ham (chopped)
- Crumbled crispy bacon
- Mini Italian meatballs
- Cooked corn kernels
- Baby spinach
- Fresh basil
- Marinara sauce for dipping
- Chopped parsley or basil
Directions:
- First, spray your mini skull baking tin with cooking spray to prevent sticking.
- Lightly dust your counter with flour to help with rolling the dough.
- Roll, pat, or stretch the pizza dough until it is about 1/4-inch thick.
- Cut the dough into 6 rectangles. Don’t worry if they are not perfectly shaped; they will still taste great!
- Take each piece of dough and lay it into the skull cavity of the baking tin.
- Start filling each dough piece with pizza sauce, shredded mozzarella, and a sprinkle of Parmesan cheese. Add your choice of toppings, such as cooked sausage, mini pepperoni, black olives, chopped ham, crumbled bacon, mini meatballs, corn, spinach, or fresh basil.
- After adding the toppings, drizzle a tiny bit of pizza sauce on top—no more than a tablespoon is needed.
- Carefully fold the dough over the fillings and pinch it together to seal like a small pizza pocket.
- Continue filling and sealing all 6 pieces of dough.
- Once done, refrigerate the filled skull pizza tray while you preheat the oven.
- Preheat your oven to 400 degrees Fahrenheit.
- Remove the tray from the refrigerator and bake for 16 to 20 minutes or until the tops are lightly golden brown. Keep an eye on them as some pre-made doughs may cook faster or slower.
- After baking, allow the pizza skulls to cool for about 5 minutes before removing them from the tin.
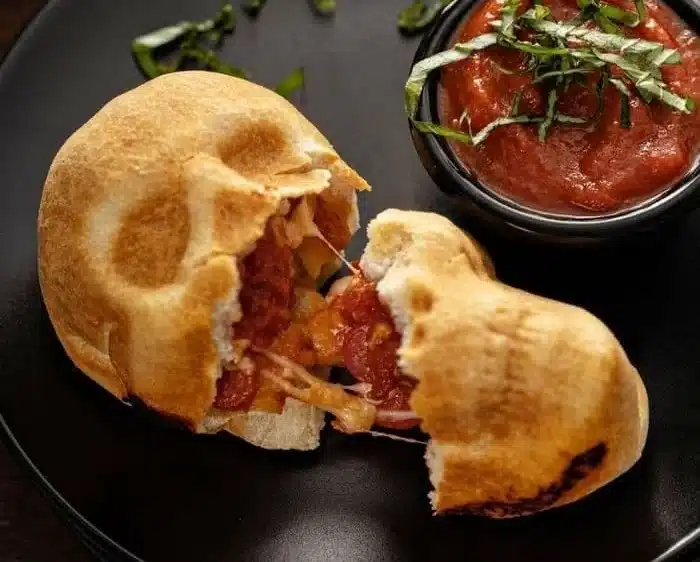
- Serve with marinara sauce and sprinkle with chopped parsley or basil for a fresh touch.
Why You’ll Love This Cheesy Halloween Pizza Skulls
Cheesy Halloween Pizza Skulls are perfect for Halloween parties, family gatherings, or just a fun dinner. The skull shape adds a spooky touch that kids will love, making them an instant hit. These mini pockets are not only charming but also packed with your favorite pizza ingredients. The flexibility of toppings means everyone can personalize their skulls. Plus, who doesn’t love gooey melted cheese wrapped in soft dough?
Nutriment Benefits
These pizza skulls offer a range of nutrients, depending on your chosen toppings. They typically feature proteins from meats like sausage and bacon, healthy fats from cheese, and carbohydrates from the dough. Adding vegetables like spinach and corn boosts the nutrient content, providing vitamins and minerals. Opt for lower fat cheese or whole grain dough for a healthier twist without sacrificing flavor.
What to Serve With Cheesy Halloween Pizza Skulls
These pizza skulls are delicious on their own but can be paired with:
- A fresh garden salad for added crunch.
- Dipping sauces such as ranch, garlic butter, or spicy marinara.
- Fresh vegetable sticks like carrots and celery for a fun snack.
- A spooky-themed dessert like pumpkin cupcakes or ghostly meringues to complete your Halloween feast.
How to Store Cheesy Halloween Pizza Skulls
If you have leftover pizza skulls, store them in an airtight container in the refrigerator. They will keep well for up to 3 days. To reheat, place them in the oven at 350 degrees Fahrenheit for about 10 minutes or until heated through. You can also microwave them, though the oven will help restore some crunchiness.
Tips and Mistakes to Avoid
- Don’t overfill: If you add too many toppings, they might not seal properly or could explode while baking. Stick to a balanced filling.
- Seal well: Ensure the edges of the dough are pinched tightly to prevent leaks during cooking.
- Monitor baking time: Keep an eye on your pizza skulls towards the end of baking as they can go from golden to burnt quickly.
- Use a light hand with the flour: Too much flour while rolling can make the dough tough.
Variation
Feel free to get creative with your toppings! Replace or add ingredients like:
- Cooked chicken or turkey for a different meat option.
- Various cheeses such as cheddar or pepper jack for a spicier kick.
- Creative themes like adding spices or different sauces to match the season, such as pumpkin or chili for fall.
FAQs
1. Can I use homemade pizza dough?
Yes, you can use your favorite homemade pizza dough. Just ensure it is rolled out to the right thickness for easier handling.
2. Are these pizza skulls gluten-free?
You can make gluten-free pizza skulls by using gluten-free pizza dough available in stores or homemade gluten-free dough.
3. Can I freeze the pizza skulls?
Yes! After they are baked and cooled, you can freeze them for up to 2 months. Just reheat directly from frozen in the oven when you’re ready to enjoy them again.
4. How long do these last in the fridge?
They can last in the refrigerator for about 3 days when stored properly in an airtight container.
With these simple steps and tips, you’ll have a spooky and scrumptious dish that’s sure to delight everyone this Halloween! Happy cooking and enjoy your Cheesy Halloween Pizza Skulls!

Cheesy Halloween Pizza Skulls
Ingredients
Main Ingredients
- 13 to 16 ounces pre-made pizza dough
- 3/4 to 1 cup pizza sauce
- 2 cups shredded mozzarella cheese
- 1/4 cup Parmesan cheese
- 8 ounces cooked sausage (for 6 pizza skulls)
- 6 ounces mini pepperoni (for 6 pizza skulls)
- to taste black olives (sliced)
- to taste sliced ham (chopped)
- to taste crumbled crispy bacon
- to taste mini Italian meatballs
- to taste cooked corn kernels
- to taste baby spinach
- to taste fresh basil
- for dipping marinara sauce
- to taste chopped parsley or basil
Instructions
Preparation
- Spray your mini skull baking tin with cooking spray to prevent sticking.
- Lightly dust your counter with flour to help with rolling the dough.
- Roll, pat, or stretch the pizza dough until it is about 1/4-inch thick.
- Cut the dough into 6 rectangles, they do not need to be perfectly shaped.
- Lay each piece of dough into the skull cavity of the baking tin.
- Fill each dough piece with pizza sauce, shredded mozzarella, and Parmesan cheese, then add your choice of toppings.
- Drizzle a tiny bit of pizza sauce on top—no more than a tablespoon is needed.
- Fold the dough over the fillings and pinch it together to seal like a small pizza pocket.
- Refrigerate the filled skull pizza tray while you preheat the oven.
Baking
- Preheat your oven to 400 degrees Fahrenheit.
- Remove the tray from the refrigerator and bake for 16 to 20 minutes or until the tops are lightly golden brown.
- Allow the pizza skulls to cool for about 5 minutes before removing them from the tin.
Serving
- Serve with marinara sauce and sprinkle with chopped parsley or basil.