
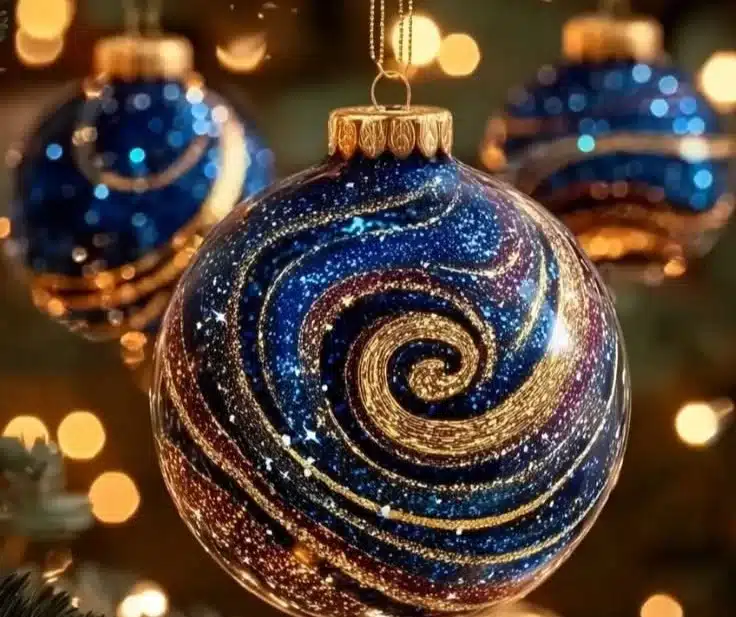
How to make DIY Ornaments Using Old CDs
Ingredients:
- Old CDs
- Acrylic paint (your choice of colors)
- Paintbrushes
- Glue (craft glue or hot glue)
- Scissors
- Glitter (optional)
- Ribbons or string for hanging
- Decorative items (like beads, sequins, or stickers)
Directions:
-
Gather your materials: Start by collecting all the items you need for your DIY ornaments. Old CDs are the star of the show, so make sure you have a few old ones to work with.
-
Prepare the CDs: Clean the CDs to remove any dust or fingerprints. This ensures that the paint sticks well to the surface.

-
Paint the CDs: Using your acrylic paint and paintbrushes, start painting the surface of the CDs. You can choose to cover the whole CD or create designs. Let the paint dry completely before moving to the next step.
-
Add decorations: Once the paint is dry, you can stick on glitter, beads, or sequins to add some sparkle to your ornaments. Use craft glue for this step for a strong hold.
-
Create a hanging loop: Cut a piece of ribbon or string. Puncture a hole near the edge of the CD and thread the ribbon or string through it. Tie a knot to secure it in place. This will allow you to hang your ornament on the tree.
-
Final touches: Add any final touches or designs you want. This could be additional paint or decorative stickers.
-
Let it dry: Allow your ornaments to dry completely before hanging them up.
Enjoy your homemade ornaments this Christmas! They make great decorations and also gifts for friends and family.
Why You’ll Love This DIY Ornaments Using Old CDs
Creating ornaments from old CDs is not just a fun craft; it’s a creative way to recycle materials. Here are a few reasons why you’ll love making these ornaments:
-
Eco-friendly: By using old CDs, you are reducing waste and finding a new purpose for items that might otherwise end up in the trash.
-
Cost-effective: This craft can be done with materials you probably already have at home, making it a budget-friendly option for holiday decorating.
-
Personalized: Each ornament can be unique, allowing you to showcase your personality and creativity. You can tailor designs to match your home decor or to give as special gifts.
-
Kid-friendly: This is a simple craft that kids can help with, making it a great family activity during the holiday season.
Nutritional Benefits
Since this DIY project focuses on crafts rather than food, there are no nutritional benefits associated. However, the act of crafting can provide mental benefits, reducing stress and enhancing creativity. Spending time working on a project can promote a sense of accomplishment and joy, especially during the holiday season.
What to Serve With DIY Ornaments Using Old CDs
When making these ornaments, you might also like to make some holiday snacks or drinks to enjoy afterwards. Consider serving warm cider or hot chocolate. These can be enjoyed while you and your family decorate the ornaments together.
How to Store DIY Ornaments Using Old CDs
When your ornaments are complete and drying, store them carefully. Here’s how to keep them safe until it’s time to hang them on the tree:
-
Place in a box: Use a sturdy box to keep your ornaments safe from damage. If you have many, consider separating each ornament with tissue paper or bubble wrap to avoid scratches.
-
Keep in a cool place: Store the box in a cool, dry place away from direct sunlight. This will help preserve the paint and decorations over time.
-
Label for convenience: If you have different types of ornaments, labeling the box can help you easily find and retrieve them during the holiday season.
Tips and Mistakes to Avoid
-
Don’t rush the drying time: Allow your paint and glue to dry completely before moving on to the next step. Rushing may lead to smudges or pieces coming off.
-
Avoid flimsy decorations: Choose decorations that adhere well to the CDs. Avoid heavy items that might fall off when hung.
-
Test your colors: Before painting the entire surface, do a small test spot to see how the color looks on the CD. Some paints may look different once dry.
Variations
-
Themed ornaments: Choose a color theme for your ornaments. For example, you could create a winter wonderland theme using white, silver, and blue.
-
Personalized gifts: Instead of traditional ornaments, make personalized gifts for friends by painting their names or decorating based on their favorite colors.
-
Holiday shapes: Instead of leaving the CDs round, cut them into holiday shapes (like stars or Christmas trees) for a fun twist.
FAQs
1. Can I use other materials besides CDs?
Yes! You can use old DVDs, cardboard, or even heavy paper to create similar ornaments.
2. How long does it take for the paint to dry?
Drying time depends on the type of paint used but generally takes about 30 minutes to an hour. Allow longer for thicker coats.
3. Are there any safety tips for using hot glue?
Always be cautious while using hot glue. Avoid touching the hot end and keep it away from children to prevent burns.
4. What if I don’t have acrylic paint?
If you don’t have acrylic paint, you can use markers or other types of paint, but make sure they are suitable for plastic surfaces.
By following these simple steps, you will enjoy a fun and creative way to celebrate the holiday season with DIY ornaments made from old CDs. Whether for your home or as gifts, these unique decorations will add a special touch to your Christmas.
DIY Ornaments Using Old CDs
Ingredients
Materials
- 3 pieces Old CDs Gather a few old CDs that you no longer use.
- 1 bottle Acrylic paint (your choice of colors) Choose colors to match your decorating theme.
- 2 pieces Paintbrushes Select different sizes for varying designs.
- 1 bottle Glue (craft glue or hot glue) Choose strong adhesive for decorations.
- 1 piece Scissors For cutting string or ribbons.
- 1 pack Glitter (optional) For added sparkle.
- 1 roll Ribbons or string for hanging Use for making hanging loops.
- 1 assorted Decorative items (like beads, sequins, or stickers) For personalizing your ornaments.
Instructions
Preparation
- Gather your materials: Start by collecting all the items you need for your DIY ornaments.
- Prepare the CDs: Clean the CDs to remove any dust or fingerprints.
Painting
- Using your acrylic paint and paintbrushes, start painting the surface of the CDs.
- Let the paint dry completely before moving to the next step.
Decoration
- Once the paint is dry, stick on glitter, beads, or sequins.
- Use craft glue for this step to ensure a strong hold.
- Cut a piece of ribbon or string, puncture a hole near the edge of the CD, and thread it through.
- Tie a knot to secure it.
Final Steps
- Add any final touches or designs you want.
- Allow your ornaments to dry completely before hanging them up.